LARD
September 20, 2017
LARD
Thursday was just around the corner, and that meant one thing: Tamaluc time. The weekly, house-wide potlucks were a major motivation for choosing to live in Tamarac House, and I was going to make the most of the opportunity. This week, I was making Mexican black beans, and “making the most of the opportunity” meant rendering my own lard that I could use to finish the beans*. Which was going to be a project, but I had the afternoon to sit idly by while a pan of pork fat sizzled away and stank up my apartment (in a good way, mind you).
The first step in making the lard was procuring the raw material: pork fat. You see, lard does not start out as the white, scoopable pork grease that everyone knows as lard. It starts out trapped in a matrix of pig proteins in one of the pig’s fatty tissues. Which fatty tissue is used determines the character of the lard– fat pockets near the kidneys produce a clean-flavored fat known as “leaf fat”, fat that is so mild in flavor that it can even be used in sweet pastries and impart no pig flavor, only the rich, smooth texture that lard is justly lauded for providing. Back fat, on the other hand, produces a decidedly more, well, porky sort of lard- the sort of lard that would impart a wonderfully rich flavor to my pot of beans. So I set out on my bicycle towards Walla Walla’s premier butcher shop.
Blue Valley Meats has always impressed me with its economy. It is a small butcher shop, and it wastes a minimum of space on anything other than its reason for existence- humanely-raised, delectable meats. A small cooler for dairy products, a whiteboard listing the restaurants that use their meats, a cupboard for spice rubs, and and a small, drying bouquet of flowers are the only extraneous items in the shop. The place smells clean, tinged with smoke from bacon-making, and it looks spotless. They are, in short, butchers’ butchers.
Matthew, a latino man with a Raiders cap and a neat beard, helped me that day. After cutting for me two pounds of pork fatback, he asked me what I was planning to do with it. I explained to him that I was making lard, as well as a brief summary of the process. We chatted some more, and he told me that the shop was started by just two guys, one of whom was his uncle. He explained that everyone in the shop “works hella hard”, but they were all practically family, so it wasn’t so bad. I was impressed by his work ethic and his congenial nature– he struck me as a solid, upstanding kind of guy. He even offered to show me the meat cooler, an offer that I jumped at the chance to accept. Behind the wall facing the cash register was a roomful of hanging animals. It was an impressive array, and not for the squeamish– cow’s heads (eyes intact) in the front, deer in the back, whole pigs on the flank closest the near wall, beef quarters opposite them. Each was a different shade of pink. I took in the sight for about a minute, thanked Matthew, and made my way back to the apartment.
*Lard from the store is usually hydrogenated, which means that it contains trans fats, tastes stale, and is generally not something that you want to be cooking with.
HOMEMADE LARD
- Pork fatback or leaf fat, frozen
- Water
- A heavy-bottomed saucepan
The goal of the process is to release the fat from the fatty tissue and evaporate the moisture from the rendering, leaving behind “crackling” (pronounced “crack-LINS”) as the cook’s reward. As the fatback or leaf fat heats, the collagen holding the fat in place begins to break down and gradually releases pork fat and moisture, sizzling as it does so. Eventually, so much moisture and fat will have rendered from the tissue that all that remains is the matrix of proteins that once held the fat. As this protein fries, it becomes “crackling”, that rich, crispy reward for the cook’s labor. What remains in the pan is lard- pure pork fat. After straining through a chinois or coffee filter, it can be stored in the fridge for several months, or even at room temperature if it is especially pure and carefully rendered.
Because the fat needs to be chopped finely, lard is easiest to make if one begins with frozen fatback or leaf fat. Take the frozen fat, chop it as finely as you can (work quickly, as it softens quickly due to the heat of your hand), and place it in a heavy-bottomed saucepan. The more uniformly chopped your fat is, the less likely that pieces will burn before the lard has been rendered. Add enough water to cover the pieces of fat, and turn the pan to low or medium-low heat (I used setting 2 on my stove). This is a gradual process, and beginning with the heat too high will lower your yield of lard. As the lard heats up, you will see the water gradually become cloudy and greasy. Continue heating for another one to three hours, until you hear a sizzling noise begin. This is a sign that most of the fat has rendered out of the lard and cracklings are beginning to form. If you used fatback, the porky aroma will begin to rear its head as well. Watch more closely, increase the heat slightly, and continue cooking. You may need to scrape the bottom of the pan with a spatula to prevent sticking. At some point, the sizzling will subside and you will see the bits of pork begin to turn a golden-brown color. When the bits turn a golden-brown, remove them to paper towels with a slotted spoon, drain the fat with a fine-mesh conical strainer or a coffee filter, and store in the refrigerator. Salt the cracklings to taste and eat at once.
Tips and Tricks:
- If you chopped your fat too coarse, it will begin to sizzle before it has fully rendered. If this happens, drain the lard you have rendered and either accept a lower yield and discard it or chop the fat more finely, add to the pan with more water, and repeat the process.
- If you turned the heat too high and the water evaporates before the fat has rendered, add a little more water and lower the heat.
Process Summary (TL;DR):
- Chop frozen fat as finely as possible and place in a heavy-bottomed saucepan
- Add water just to cover and turn to low/medium-low (2ish on the average electric)
- Heat until the pan begins to sizzle, about one to three hours
- Increase heat slightly and cook until the remaining pork has turned a golden-brown color
- Remove cracklings and drain on paper towels. Strain the fat from the pan and store in the refrigerator.
- Eat the cracklings at once.
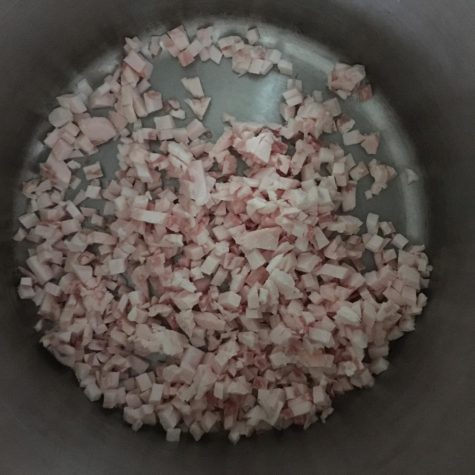
Chopped fatback: a little coarser than ideal, but it worked out okay.
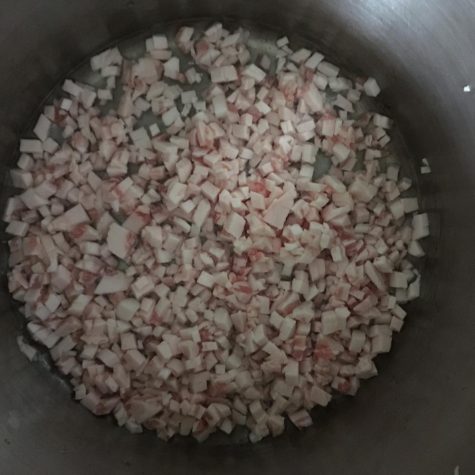
Water added.
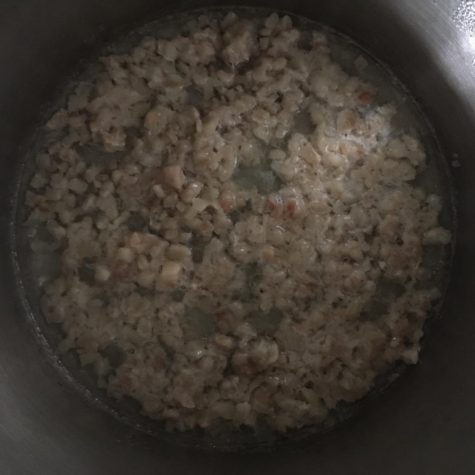
After about an hour of cooking.
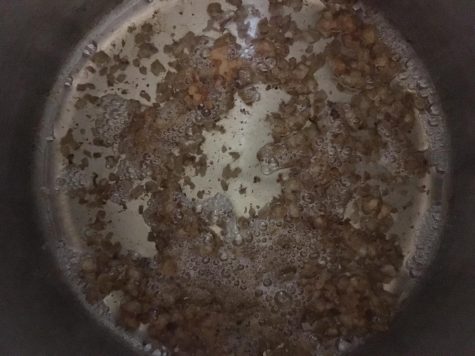
After about an hour and a half of cooking.
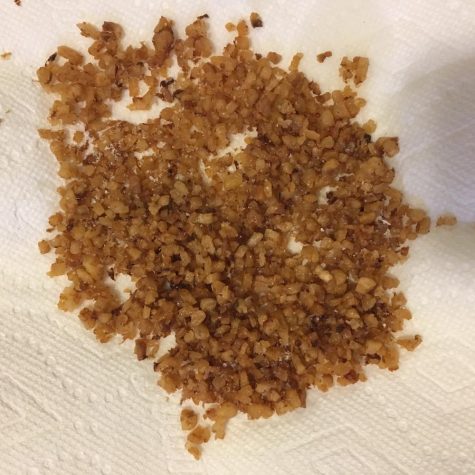
Cracklings drained and salted, ready to eat!